Showing posts with label Tiger. Show all posts

Wednesday, July 3, 2013

Tiger WIP Update 7

Tweak it some and signed it.  I haven't mentioned lately that the awesome reference for this was used with permission from Woxy on Deviant Art.  Thank you Woxy!

Hope you like it!

Thanks for stopping by :)

Tuesday, July 2, 2013

Tiger WIP Update 6

Worked on this for a few more hours today and except for tweaking, it's finished :)
Rick now says it's his new favorite so I guess I accomplished what I wanted to!
Before now the long haired kitty Sweet Huia was his favorite.
I need to figure out what color to use when I sign it.  Any suggestions?
Any Suggestions for helping me name this one??
 Hope you like it!

Thanks for stopping by :)

Friday, June 28, 2013

Tiger WIP Update 5

I was able to spend about three hours on this today.  I'm so close to being finished.  Probably about another two or three hours. 
Hope you like it and I'm not boring you with my numerous updates.

Thanks for stopping by :)

Wednesday, June 19, 2013

Tiger WIP Update 4

I was able to put some time into this and it's really coming along now.  I don't really know what I'm doing but it seems to be working and I'm really starting to like this one.  I love happy accidents and that's what happened with the background LOL!

Hope you are enjoying the continuing progress!

Thanks for stopping by :)

Monday, June 17, 2013

Tiger WIP Update 3

Up until today, I didn't have enough done to post another update.  This is going slowly but surely.  I really have no idea what I'm doing but seem to be doing it LOL!
Most of the background was created with complimentary colors of red and green with the added color of blue.  All work is being done at this point with Faber Castell PITT Pastel pencils.
Hope you are enjoying the process as much as I am!


Just for fun, I played with some new charcoal pencils that I bought.  This drawing is a 5" x 6" on cheap sketching paper using 2B and 4B Generals Charcoal for the blended background and then using graphite H, 2B - 4B for the rest.
Had a lot of fun exploring new techniques with blending.
Reference for this lovely wolf is by DallieDee on Flickr under the Creative Commons License


Thanks for stopping by :)

Saturday, June 8, 2013

Tiger WIP Update 2

I had so much to do today outside that I didn't get much time to work on this painting. I did work on it for about 1.5 hours today.  Tried to increase the orange color a little bit on the Tiger.  Still need to "push my darks" with the viewers left side of the Tiger.  I also need to add more blue to the leaves because they are looking a tad yellow to me.
I worked a lot on that background.  I'm basically creating and making it up as I go.  Hopefully, it's looking OK?  I stopped working on this when it was time to feed my horse and dog.  After I took a scan and put it back, it was time to do some more painting. I painted for 3.5 hours straight and it wasn't art LOL.  I applied a wood stain to our front porch and stairs. 
Hope you are enjoying the progress as much as I am!

Thanks for stopping by :)

Monday, June 3, 2013

Tiger WIP Update - 1

WOW has it really been that long since I worked on this?  I finally got back to doing something with this painting.  It's taking a lot of time to get the colors the way I want them and I don't have a lot of colors to choose from.  Still coming along.  I worked on this a little over an hour today but my back is really bothering me so that's all I was able to do.  Might be able to get back to it later today.  This is on Cason MiTeintes paper using PITT Pastel pencils by FaberCastell.
Hope you like it so far!

Thanks for stopping by :)

Monday, May 13, 2013

Tiger- WIP Update

Well, I got a little carried away today while working on this painting and forgot to stop and take progress pictures.  I used all the same colors as the previous post an also introduced new colors to the painting.
The new colors were:
102 Cream, 165 Juniper Green, 168 Earth Green Yellowishh, 184 Dark Naples Ochre, 233 Cold Gray IV, 181 Payne's Gray, 230 Cold Gray I and 131 Medium Flesh.
I continued on with the fur and started added in the darker areas. I also started on the leaves.
Hope you like it!

Thanks for stopping by :)

Thursday, May 9, 2013

Tiger - WIP

This drawing is based on a fabulous photo used with permission from Woxy on deviantart.
This drawing took a very long time to get right and when I finally got it transferred to my working surface, for some reason I was afraid? to start the next step with this one but finally bit the bullet today and just started it.
It's been fully drawn out and transferred to the final platform  which is a 9 x 12 Sheet of
Steel Gray Mi-Tientes Pastel paper since March 9th.  I will be using Faber-Castell PITT Pastel Pencils to complete it.
Ha, just realized it's been exactly two months since I finally finished the drawing. 
I haven't done any art on this color of paper and I've only completed two other pieces on colored paper so this is definitely going to be a learning experience for me.  


For some reason the scan of the drawing lightened the paper considerably.  Not sure why.  The second image is closer to the actual color of the paper.


I'm trying to create a step by step with this one so there will be a lot of pictures showing the progress.

Hope you like it!

 
Transferred Drawing:


The transferred drawing
I believe the eyes are the windows to the soul and I always try to capture that from the first pencil stroke.  
I want to get the expression and eyes accurate before I continue on with the rest of the portrait.
If you get the eyes right, the rest of the portrait just flows!
If the eyes are not right, I can't continue with the portrait!

Because I'm working on the Steel Gray paper and the eyes are mostly a light yellow, I started with an underlayer of 101 White and then added 103 Ivory. Marking in the highlight and filling the lower eye area with White then putting a layer of Ivory over the top (avoiding the highlight) and also starting on the white fur around the eye.  I put a little bit of the 177 Walnut Brown around the eye to start getting the shape and depth of the eyes in the very middle of the walnut brown I added a touch of 169 Caput Mortuum.

Next I brought a little 183 Light Yellow Ochre and 182 Brown Ochre into the eyes and added 177 Walnut Brown for around the eye and the under coat on the pupil. 
Using the 183 Light Yellow Ochre and starting at the top half of the eye and bring it down into the mix of the Ivory base gradually getting lighter with your pressure. With the 182 I did a light layer on the top half of the eye and lightly over the pupil. The 177 was then added around the eye and over the pupil. I used the 103 Ivory and the 182 Brown Ochre for blending the colors in a nice gradual gradation.
These eyes are less than an inch across so care had to be taken to not lose the highlight in the eyes.
Adding the color

I outlined the eyes in black, put black on the pupil and started branching out from the eyes. 
I try to create a gradation of light to dark to capture the spherical shape of the eyes and the depth under the eye is created by adding the gradation from dark and moving down the eye.  Stopping at the halfway point with the darker colors and blending them into the light colors.
The darker colors used in the eyes were also 173 Olive Green around the outside of the pupil  and 182 Brown Ochre. 
I added a touch of 140 Light Ultramarine Blue in the highlights to reflect the sky.

The markings are first done in the 177 Walnut Brown and then Black is put on top.  
To further enhance the black stripes, I added a touch of 151 Helioblue.
For the rest of the fur I've used 101 White, 103 Ivory, 183 Light Yellow Ochre, 182 Brown Ochre, 187 Burnt Ochre
Moving out from the eyes
Continually branching out from the eyes.
This is as far as I've gotten today. 


Today's Progress 5/09/2013
Thanks for stopping by :)
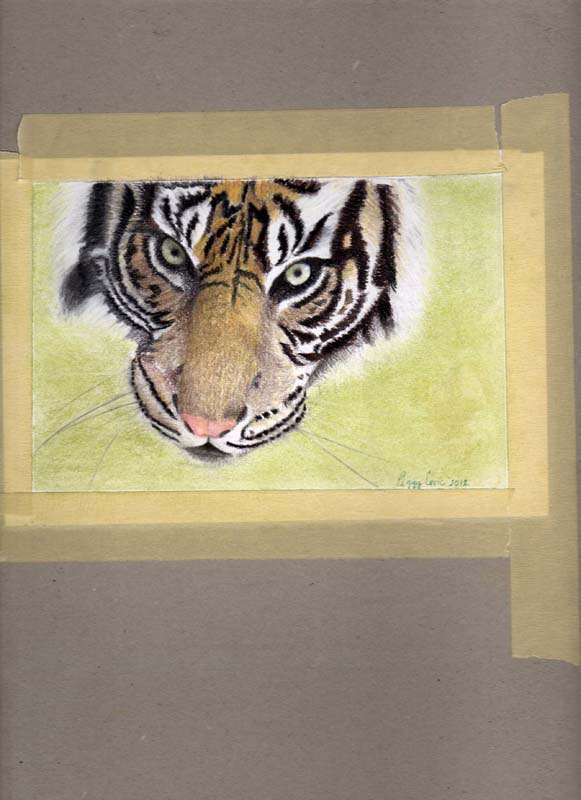
Thursday, September 13, 2012

Tiger ACEO

I'm having fun exploring my pastels on different paper.  Again, this is a little painting 2.5 x 3.5 ACEO (Art Cards Editions and Originals).
It's on Strathmore Bristol Vellum (smooth side) using Rembrandt pastel and Faber Castell PITT Pastel pencils.
This original is for sale for $25.
If you're interested, contact me.

 Thanks for stopping by :)

Sunday, August 26, 2012

Little Doodle

Haha, as the title suggests, this is a little doodle to challenge myself with the ACEO size of drawing.
It's not finished and probably wont be.  Again, it's not done with proper tools  but was done with copy paper and 0.5mm mechanical pencil.
Hope you like it anyways!

Wednesday, March 21, 2012

Pastel Tiger Finished

I couldn't leave it alone so this is how I finished it LOL!

Update on Tiger -- Pastel

Here's what I did with the Tiger face I was working on.  I really like how it turned out but also found out a few more things about these pastels.  This is definitely a learning in progress LOL! 
I probably shouldn't have tried something so small for my second piece LOL! To give you an idea of the size, the paper is 5 x 7 and of course the drawing is smaller than that!

Tuesday, March 20, 2012

More Pastels - Tiger WIP

I really debated posting this.  It's not on my other pastel paper and I'm really not sure what kind of paper it is.  I have a 5x7 sketch book that says it's suitable for all dry media.  It's a 110 gsm so I decided to try doing something smaller with my pastel pencils.
Let's just say, I'm still learning LOL!